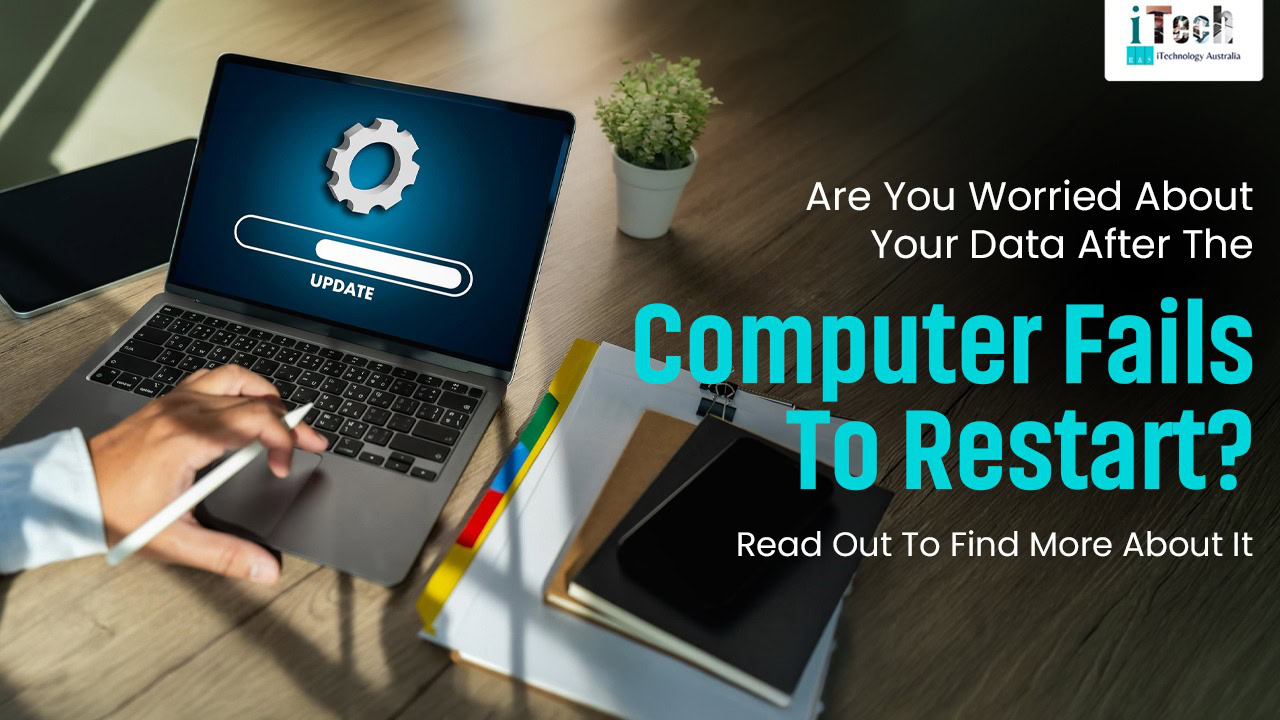
Posted on Leave a comment

Tips To Secure Your Data In Raid Storage Array

In a world, where data is the most critical aspect, it needs to be protected properly. Data is the lifeblood of business, even if one runs a creative studio or  any other organisation. RAID storage is the array that provides a responsible way of protecting data against hardware failures; a redundant array of independent disks or the RAID system is an effective and clever way of storing similar data in different places and on other hard disks as well. So this helps to protect data and make it accessible; consider the following to secure your RAID setup.

1. Select the right RAID level

Not every RAID level provides the same protection; for example, raid zero boots provide no redundancy, while RAID5 and RAID6  both provide good performance and fault tolerance. Choosing the right level for your business needs, even if managing the high volume content for clients., is crucial to balance speed, storage efficiency and data protection.

2. Building a regular backups raid 

This is not a replacement for backup malware and hardware challenges, or any accidental deletion which can result in data loss, but helps in saving the data.. For any organisation, a loss of data campaign is so deleterious that an automated backup is necessary.

3. Monitor Your RAID Health

Use RAID management tools to monitor disk status, temperature, and error rates continuously. Early detection of a failing drive allows you to replace it before a failure occurs. This is especially important if you’re handling critical projects, where data integrity directly affects client satisfaction.

4. Quality Hardware with High standards

Don’t economize on hard drives or RAID controls in any type of enterprise as misuse of confidential data can lead to a lot of loss for the company

5. Restrict access and use encode

Restrict those who can access your RAID array and encrypt sensitive data to prevent improper access, even if it’s keeping the information of customers crafting assets or marketing analytics.

Securing your RAID storage array is more than a technical necessity; it’s a business requirement. From managing digital campaigns to offering premium quality products, securing our data is important to ensure smooth operations, and improve client confidence. Whether you’re a startup or a recognized company,following these RAID security tips will help protect your most valuable digital requirements. For having the best knowledge regarding the same, take the services of the best company in this regard, ITechnology Australia. We will guide you the best and provide an exceptional level of services at an affordable price.

Posted on Leave a comment

4 Effective ASUSTOR NAS Drive Data Recovery Methods

Losing data can be a harrowing experience for a variety of reasons. One needs to make certain that they can effectively recover the lost data. If you have an ASUSTOR NAS driver installed in your systems, there can be several reasons behind the data loss. One needs to know where and how one loses their data in order to recover it effectively. With the help of experts at iTechnology Australia, you can make certain that you are able to thoroughly recover your files and use them as normal. 

In this blog, we will extensively discuss the reasons behind an ASUSTOR NAS drive-induced data loss and the effective ways you can thoroughly recover and use them again.  

Common Reasons Behind Data Loss

There are several reasons why an ASUSTOR NAS drive fails on the user; some of these reasons are as mentioned below: 

  • Corruption of Files: If the file system or software is corrupted, it can lead to losing access to data. 
  • Failure of RAID System: If the RAID system fails, you can lose comprehensive access to all your files. 
  • Malware or Ransomware Attacks: If your system has been attacked by malware or ransomware, it can thoroughly corrupt all the systems and lead to an ASUSTOR NAS drive collapse.
  • System Crash: The drive could have also lost data in a system crash or a power outage. 
  • Hardware Troubles: If there are any issues with the hardware systems, it can also thoroughly lead to a crash in the system.  
  • Accidental Factory Reset: If you or someone you know has accidentally done a factory reset on the ASUSTOR NAS drive, it can lead to losing access to all your files. 

Methods of ASUSTOR NAS Drive Data Recovery 

If you are trying to recover all the lost files on your drive, there are several methods you can adopt to recover them effectively. Some of these data recovery methods are discussed below: 

Method #1: Use the Provided Backup Solution 

With most ASUSTOR NAS drives, there is an option to ensure that one can thoroughly backup their data in a remote, cloud-based provision. If you had this option switched on before your drive gave up on you, you can easily install a backup from the cloud-based service. This method is the fastest way to restore access to your files. 

Method #2: Hot Swap Methodology 

If you have not availed yourself of the cloud-based backup systems, you can also try to hot-swap the damaged drive with a functioning one. In order to successfully hot-swap an ASUSTOR NAS drive, you need to keep the NAS system running while you physically make the switch. 


Method #3: Restore From Your Physical Backup 

If you have maintained a physical backup of your files on an ASUSTOR NAS drive, you can also thoroughly make certain that you are able to restore your access to your files by ensuring that you can copy and paste the backup files onto your computer. This process is painstakingly tedious to do. 

Method #4: Contact Professional Services 

If none of the aforementioned methods work for you, you can seek help from a professional data recovery service. With professional services, you can sit back and relax. You do not have to worry about anything as they recover your data for you. 

No matter whether it is your work computer or your personal one – losing data can be an equally harrowing experience. One needs to make certain that you are able to thoroughly recover your data in an effective manner. There are several methods you can adopt, as discussed above. With the help of iTechnology Australia, you can make certain that you are able to recover your NAS drive thoroughly. Our team ensures the best possible recovery practices are employed to drive you toward productive results.  

Posted on Leave a comment

Recover The Lost Cctv Footage From Corrupted Dvrs Or Hard Disk

Recover Lost CCTV Footage Fix Corrupted DVRs or Hard Drives

CCTV footage has crucial data, and if it is stolen or corrupted, it is a stressful situation. Every footage contains vital evidence. Nowadays, security professionals face this problem. This complete instruction helps you to recover your valuable data.  

Understanding the problem: The DVR system composites and records data on a continuous basis. This constant operation leads to power outages, corrupted files, and hard drive failures. In certain cases, there is a chance that you will lose footage forever. Some DVR brands, such as Hikvision and Dahua, use a unique file system. The generic tools fail to recognise the process as the complexity increases in the data recovery process due to variability.

Causes of Corruption

  • Power failure can cause damage to the computer system, and sudden voltage issues can harm the hard drives and damage the file system. Battery backups play a crucial role in preventing these problems.
  • Physical damage also creates damage to hard drives as they are sensitive and can be corrupted instantly. Water and fire can damage crucial components; water can ruin the electronics, and fire can melt the components.
  • Human error also contributes to the various challenges. Files can be corrupted due to improper shutdown, and accidental deletion can cause footage to be lost and data to be erased. The staff should be adequately trained to minimise the risk.

Initial Valuation Steps

  1. Begin with basics. Keep an eye on the power connection. Precisely check the cables. Go through any physical damage sign and write down everything you need. 
  2. Closely examine the hard drive. Clicking spells trouble. If they crush any noise, it leads to failure. A normal drive works quietly, but a wired sound means a problem.
  3. Carefully check the DVR and inspect the power on correctly. You should watch any strange behaviour or error message notes to record all the symptoms. 

Expert recovery techniques:

  • Specialised CCTVs services are available, and they are trained to handle the inspection system carefully. The success rates are high, and the tools are used for professional purposes and are majorly used in critical cases.
  • They provide work with expertise and prevent further damage, as they use specialised tools and techniques. They provide valuable expertise.
  • The Cost can vary between services. Critical services cost more. Increase in prices due to rush jobs. Regular services will lead to lower costs in the future. The budget can be made accordingly.

DIY recovery Methods

  • Software solutions exist. Some require payments, while some are free tools. Research wisely and choose a reputable program.
  • First of all, create the exact copies. Working on copies is easier as the original copies are protected. This is the crucial step, and mistakes are less costly in this step. 
  • To prevent accidents, always use blockers. They protect evidence and maintain integrity. It is helpful in legal cases.

Technical recovery steps

  • Take no shortcuts, follow proper safety procedures and apply appropriate power procedures.
  • Scan for file and video formats.
  • Identify file fragments and recreate them when possible.
  • Check the file structure, repair and resolve the issues and maintain the data integrity.

Specialised DVR tools

  • DVR examiners have knowledge about all the formats and know how to rebuild video files, but this costs money.
  • The recovery of CCTV footage works very well. It extracts video directly, but it focuses on specific brands.
  • For example, PC-3000 is a professional grade. It mainly fixes the physical issues. There is a need for training, and it costs thousands.

 Preventive Measures

  • Always install the UPS System. They help to prevent power issues, allow proper shutdown, and protect hardware.
  • Always use backup footage regularly, store the copies separately, and follow the 3-2-1 rules.

In the end, there is a need for experts in complex cases, and to know your limitations, critical footage needs the help of professionals to calculate the risk versus reward and involve the equipment expenses. If you are looking for professional help, then iTechnology Australia is here to offer you quick and reliable services. Our team provides you with exceptional service experience that will resolve your computer or data-related issues. Contact us, and our experts are here to provide the best solutions to your problem.

Posted on 29 Comments

5 Effective Methods to Recover Data from a Failed or Crashed SSD

Top 5 Methods to Recover Data from SSD Failure

Losing access to your SSD all of a sudden can prove to be a thoroughly disconcerting reality for numerous people. Most people do not take secondary backups of their data every single day. Therefore, this can thoroughly lead to panic when your SSD fails on you. However, there is no need to panic whatsoever. With the help of effective recovery, DIY methods or approaching a professional team such as iTechnology Australia, you can make certain that you are able to actively undergo data recovery procedures regardless of the condition of your SSD. 

Why Did Your SSD Fail? 

There can be numerous reasons why your SSD can fail you; some of them are explained below. However, it is important to note that most of these instances are recoverable. Therefore, one does not need to panic overtly. 

  • Controller Malfunctions: This is perhaps one of the most common reasons an SSD fails. When the small chip responsible for SSD operation fails, it is known as a controller malfunction. 
  • Power Surge Issues: Accidental power surges can also cause your SSD to fail or crash thoroughly. 
  • Degradation of Flash Memory: As the SSD gets older, its flash memory degrades. SSDs have limited cycles, and once the cells are beyond a specific threshold, they can thoroughly lead to the device’s complete failure. 
  • Corruption of Firmware: SSD might also fail if it runs into corrupted software, power surges and issues with the updates. This can lead to the drive’s operational instructions being overwritten. This, therefore, can be another reason why the SSD gets corrupted.  

What are the Different Methods of SSD Data Recovery?

Although there are several methods of SSD data recovery, in this specific blog, we will only discuss five of the most effective ways of engaging in SSD data recovery

Method #1: Ensure It Is The SSD, Not Your PC

In order to thoroughly ensure that the issue is in your SSD, you can purchase an external SSD enclosure. By placing your SSD in the external enclosure and attaching the device to a different PC, you can identify where the trouble lies. If the drive appears on the secondary computer, this means that something is wrong with your computer rather than your SSD. This method acts as a good elimination procedure. 

Method #2: Power Cycling Method 

By running a power cycle, you can revive failed and crashed SSDs. To run a power cycle, one needs to press power on for 30 seconds and then power off for 30 seconds. Then, one needs to repeat this cycle three times. On the fourth attempt, one needs to leave the system running for several minutes. Check if your drive appears in the system. If it does, your SSD has been thoroughly revived and can be used now. With this procedure, you can extensively correct any minor errors in your SSD.  

Method #3: Specialised Recovery Software 

With the help of specialised recovery software, you can make certain that you are able to thoroughly recover files from the malfunctioning SSD. You can easily find several software programs designed specifically to target flash memory. Once you connect your SSD as a secondary drive, you can make certain that you are able to access your files and recover them effectively.

Method #4: Run Bootable Recovery Environment 

One can attempt to run a BIOS fix by making a bootable USB with Linux and running that instead. You can easily ensure the possibility of tracking and being able to run your SSD with a Linux operating system since, at times, Windows and macOS can fail to recognise your SSD at times.  

Method #5: Seek Out a Professional 

Lastly, if nothing from the aforementioned do-it-yourself methods work, in order to thoroughly recover all the data on your SSD, you need to seek out the help of a professional. At iTechnology Australia, you can easily access this service in a thorough and reliable manner. Our team ensures that you are able to recover all your files without any further corruption. Ensure that you are able to thoroughly recover important data with the help of iTechnology Australia today! 

Posted on 11 Comments

Get A Quick Fix On Your Hard Drive By Following These Two Easy Steps

Quickly Fix Your Hard Drive with These Two Simple Solutions

The pain of losing your most important documents or cherished memories in software form hurts, and everyone can relate to how frustrating it is. The thought of starting afresh or not seeing it again really cuts deep, but! What if we told you we could help you recover all lost data just like that?Yes! We can help with data recovery. Follow through if you want to know how.

What Is A Hard Drive?

A hard drive is primarily the physical device inside a computer for storing user data.

Factors That Contribute To Hard Drive Crashes

Hard drive failure occurs for multiple reasons, including physical, mechanical or software issues. Here are some of the leading causes of hard drive failure.

Physical Damages

Physical damages may include overheating, coming in contact with fluids that can cause short circuits, and dropping or bumping the hard drive, damaging delicate internal structures.

Mechanical Malfunctions

A faulty circuit and motor failure can prevent the hard drive from properly functioning. Usually, when the motor stops working, the drive stops accessing data.

Software Issues

Software issues include viruses or corrupted files. These can disrupt the function of your hardware.

How To Recover Data From A Damaged Hard Drive

Data recovery from a damaged hard drive may seem tedious. Here are some of the steps to recover data.

  • Assessing the damage will help you determine what the problem could be. If there are some unusual noises, that is physical damage and should be taken to a professional for a broken hard drive data recovery.
  • Logical damage occurs when the drive is recognized but the data is inaccessible. In this case, some software methods must be applied to gain data recovery from a damaged hard drive. These software include Disk Drill, Stellar Data, and so many more. First things first, you have to download and install the selected software of your choice. Afterwards, connect the damaged hard drive to your computer and run it. Lastly, preview the lost files, recover them and save them in different locations to prevent future data loss gain. 

Ways To Keep Your Data Safe

  • There are many ways to store data; thanks to technology, people can save their data in the cloud, not a literal cloud. Well, a cloud is a new way to keep data and avoid it from getting lost. These include Google Drive,iCloud and Microsoft Drive.
  • Backing up your data daily to ensure data recovery in case of hard drive malfunctions.
  • Investing in a durable and long-lasting hard drive will help prevent data loss.
  • Installing and updating antivirus and anti-malware 

Hard drive damage and data loss can be stressful, especially when essential files and documents are at risk. That is why it is imperative to act fast when you experience a damaged hard drive; iTechnology Australia will be there to save the day. We will assess and repair every part with scrutiny to ensure that you recover your data and get your hard drive working quickly. 

Posted on Leave a comment

How Can You Recover Data from a NAS Raid in 2025?

How to Recover Data from a NAS RAID in 2025

Data is one of the most precious things one can have. Be it on a business level or a personal level – data defines so much of the digital economy that it is imperative to protect it at all costs. A business cannot function without data. Therefore, losing it in any regard can prove to be a challenge. If your business has lost data for any number of reasons, it is imperative to make certain that you are able to recover it thoroughly. With the right tools and techniques, you can easily aid the process of data recovery. 

When it comes to data recovery, you can thoroughly and effectively recover data from a NAS Raid in 2025 

Assess and Change the Malfunctioning Hard Drives 

One of the first things you need to do is take out and assess the hard drives. It is imperative to make certain that you are able to find where the fault lies. One can also make sure that you can change the malfunctioning hard drives in a thorough and effective manner.  

Methods for Data Recovery

Use Backups Effectively to Restore Data 

Another useful thing would be making effective use of backups. If you have a backup, you can restore all the lost or corrupted data through that. If you have not invested in a backup, now would be a good time to do it. This will make certain that you are secure in the future. 

Use Integrated NAS Recovery Tools 

Several NAS brands thoroughly come with a recovery tool system. One can thoroughly make certain that you are able to access these pre-installed tools in order to recover lost files. If you want to correct minor corruptions, make sure to use the file system repair option thoroughly. You can easily make certain that you are able to correct files using integrated tools. 

Ensure Manual Repair 

If your NAS system has turned unresponsive, it might be worth the effort to make certain that you are able to also remove RAID drivers. One needs to connect the disks to a computer and launch the RAID recovery system in order to ensure that you can thoroughly recover and restore your files. 

Consult NAS Support 

If nothing seems to be working, it might be worth the effort to get in touch with the NAS support. They can effectively and essentially guide you to the right solution. 

Data is one of the most vital life sources any business can have. If you have accidentally lost or corrupted the data, you need to make certain that you are able to recover it effectively. With the help of experts at iTechnology Australia, you can make certain that you are able to thoroughly recover all the data lost in a NAS Raid. By following the aforementioned steps, you can easily make certain that you can recover all your lost data in a thorough and effective manner. Make sure that you understand the process to aid your data recovery in an essential manner.

Posted on 109 Comments

How To Do Brand Management?

How to Build and Manage a Strong Brand: Expert Tips

How your brand performs in the market totally depends on how people perceive your brand online, as this is the era of digital marketing. Are people satisfied with your products? If they are, they will automatically write good reviews about your company; however, the case can be the opposite if they are not satisfied. They can even jot down negative comments about your brand. Therefore, you need to be exceptionally careful regarding this. 


Next thing that should be taken into consideration is what elements of your products are preferred by mankind and what are detested by them. That will help you to work on the loopholes of your products and enhance them so that people become fans of them. 


The third most important factor is your Google Business Profile’s star rating. A good star rating helps to generate good profits and goodwill in the market. A single negative comment can have adverse repercussions on your business. Hence, do brand management; in other words, try to manage the reputation of your business online. 


Business Online Reputation Management

Let us now first understand what online reputation management is and how it matters:

Online reputation management is basically an extremely lucrative tactic followed by businessmen. Under this, people’s perception of one’s brand online is monitored and improved simultaneously. 


You need to respond to every comment online, and if there are negative comments, delete them. Not only this, one needs to set up search engine optimisation and develop good public relations so that their brand reputation gets enhanced more. Having a good relationship with customers online is extremely pivotal in making your brand stand out in this competitive world. 


Improve Customer Service with Brand Mention Monitoring

Monitoring brand mentions: 

If any of your customers are having problems with the product, then immediately resolve the issue at the earliest before other people come to know about it. Therefore, you need to monitor what customers are saying about your company. You can use some techniques to know that someone has commented or posted something about your brand. 


  • Google Alerts: Whenever your brand name is mentioned somewhere online, you will receive a notification about it, and then it will become easy for you to respond. 


  • Social listening software: You get the facility to monitor conversations on social media through social listening tools. By engaging in these conversations, you come to know whether your products are being praised or people are complaining about them; by knowing so, you can work on your loopholes. In this way, brand management is done only. 


Quickly Responding to Social Media Comments: Best Practices for Engagement

How to respond to people’s comments on social media

Respond quickly

You should reply to the comments of the customers of your brand within 2 days only. This shows that you give priority to your customers and understand their importance. 


Be professional

Even if you receive negative comments, be professional and polite all the time. Never write anything wrong about a person; always try to handle things in a positive way. 


Acknowledge positive reviews

If you receive positive comments for your products, then be thankful to the people who have commented. Never neglect these comments, as they are a sign of disrespect. 

iTechnology Australia is the best agency for digital marketing that helps you to grow in this competitive world properly. You are able to stand out among all due to the expertise of our professionals.

Posted on 110 Comments

5 Easy Ways To Connect Your Google Nest With WiFi

Connect Google Nest to WiFi in 5 Easy Steps

Are you looking to bring a smartphone-like experience to your home? Google Nest is the perfect solution. However, it’s crucial to have a reliable internet connection to fully utilise this smart technology. If you’re new to the world of smart home devices, setting up your Google Nest with WiFi can provide you with an exceptional experience. Here are the steps to connect your Google Home to WiFi.


Google Nest WiFi Pro

The Google Nest provides fast wireless connectivity across your house. The Nest WiFi pro mesh router is the award-winning Nest with fast WiFi 6E standard, as it supports the 6 Ghz power of the routers. It is twice as fast as the more widely used WiFi because of the low latency and rapid wireless speed up to 4.2gbps. The product is available in 3 packs. A single router can be used for larger homes. 


The Google Nest Pro single router can cover 120 square meters, which is sufficient for one or two bedrooms. If you have three or more bedrooms in your home, then Google Nest WiFi Pro Three packs is sufficient. The older version of the traditional Google Nest WiFi Pro, known as Google Nest WiFi, extends wireless networks using points rather than individual routers.


Effective ways to effortlessly link your WiFi to Google Nest


1.Install the Google Home app. Start by installing the Google Home app on your smartphone or tablet from the App Store for iPhone users or Google Play for Android users. Once installed, log in with your Google account. Ensure that your mobile device is connected to the same WiFi network you want to connect your Google Nest device to. The app serves as your control hub, enhancing efficiency and simplifying the setup process.


2.  Plug in and switch on your Google Nest device. Connect your Google Nest device into a power socket and wait for a moment to start up. You will hear a sound instantly or view an indicator light when your device is all set to begin. For a smoother setup experience, place your device close to the router to avoid connectivity challenges.


3. Add your device to the Google Home app. In the Google Home app, click on the “+” button to include a new device. Choose “Set up device” and then click on “New devices”. The app will precisely look for nearby devices. As soon as your Google Nest device is listed, choose and proceed with the on-screen directions displayed on your screen.


4. The app will join the device that is nearby. It should include your Google Nest. Begin the setup by tapping it and your Google Nest device is ready and make a sound to verify the device that you want to connect. The service can be accepted when requested.


5. After accepting the app the device will ask you which WiFi network can be connected to the device. Then select the WiFi network which you want to connect with the device. Then the device will try to connect and it takes a few seconds. As this is the simple way to connect the Google Nest with WiFi.


6. Once your Google Nest is connected you can customise the settings accordingly such as voice match, language preference or spotify.


7. After the setup, to test the connection; ask something to Google like hey Google! What is the weather report for today? If the appropriate answer is  given by the device then it means WiFi connection has been established. If you face any problems, check the strength of your WiFi and make sure to connect the google within the WiFi range.


Resolving Connectivity problems:

There are some of the reasons that your Google Nest is not connected to WiFi it includes:

  • Sometimes your VPN may cause issues when connecting Nest with Google Home. Turn it off for a while and try it again. 
  • Compatibility problems may arise when WiFi devices are purchased from other nations.
  • Previous Google routers and Google Nest Pro cannot be used together in the same network due to difficulties in connection.
  • Place the routers and points in the area so that furniture and fixtures can easily access the network. Sometimes, the furniture may delay the signal.

Conclusion: Through this information, you can connect Google Nest to WiFi easily. You can also consider professionals who can help you fix technical problems. You can contact iTechnology Australia. We have solutions to all your problems regarding iPhone repair, data recovery solutions, etc. We are sure we can provide you with personalized solutions that can cater to and fulfil all your needs.

Posted on Leave a comment

Top 5 Tips to Secure Your Data in Raid Storage Array

Top 5 Tips to Secure Your Data in Raid Storage Array

The most precious thing for anyone is their data. It is the main element in the technological world that requires your attention and care. But if your data gets lost? This can lead you into big trouble. However, with the RAID system, you need not fret about anything. 


A redundant array of independent disks or RAID systems is an effective and clever way of storing similar data in different places and on various hard disks or SSDs. This helps in protecting your precious data when a drive failure occurs. In other words, this is the best system to opt for lost data recovery in Sydney

However, people who are new to the RAID system can follow the below-mentioned tips to effectively use it: 


  1. Select the apt RAID configuration 

You need to select the apt RAID configuration, such as: 

  • RAID 1 – This helps in protecting your data by using double the storage space. 
  • RAID 5 and 6 – This helps in spreading your data for better speed and provides information about error correction. RAID 5 can survive one drive failure, whereas RAID 6 can survive two drive failures. However, data recovery in Perth can take some time. 
  • RAID 10 – This is a combination of mirroring and striping for great protection and speed. However, RAID 10 requires great storage space. 


  1. Avoid your data getting lost in the cloud

To avoid your data getting lost in the cloud, it is essential to back it up even with RAID. If there is any RAID failure, deletion by any chance, or power surge, it can threaten your data. This is why cloud storage or external hard drives are the best backup options. You can set up an automatic backup schedule, and this should not be done only once a year. 


  1. Focus on reliable hardware and maintenance 

Here is how you can focus on reliable hardware as well as maintenance: 

  • Select the right fighters – Opt for enterprise-grade hard disk drives or solid-state drives. They are created for RAID environments. Plus, they have extended warranties and have error-correction capabilities for better data protection. 
  • Keep an eye on your drives – Try to keep an eye on the health of individual drives within the RAID array. This can be done with the help of built-in management tools as well as third-party software. Further, a close detection of the drive failures can lead to proactive replacements before experiencing any data loss. 
  • Keep everything cool – It is essential to maintain adequate airflow within the storage enclosure. This will help avoid overheating, and good ventilation can help RAID systems run smoothly. 


  1. Have a disaster recovery plan

Anything can happen even if you have planned the best. However, having a disaster recovery plan can be effective in bouncing back from data loss. Getting data recovery Perth services can help you during the crisis and survive nearby disasters. Also, don’t forget to test the disaster recovery plan. 


  1. Leverage hot spares as well as controllers. 
  • Hot spares – These are known to be dedicated spare drives. Within the RAID array, they can automatically replace a failed drive through the rebuild process. Further, it is effective in reducing downtime and risk of any data loss. 
  • RAID controllers – Modern RAID controllers have features such as online rebuild as well as background parity calculations. It helps in improving the performance as well as the efficiency of the system. 

Conclusion 


If you are looking for lost data recovery services in Sydney, then iTechnology Australia can offer you the best solution. Our RAID system will allow you to spread your data on various hard drives and keep it safe. Our RAID system will allow you to enjoy things at a fast pace and relax, knowing that your data is protected. However, ensure that you follow the above-mentioned tips to get the best out of the RAID system. 


Posted on Leave a comment

Methods to Recover the Hidden Files from Your Phone

Sometimes, you can lose your data due to any type of fault in your mobile phone, but in other cases, you can lose some of the files that are important. You store them in hidden folders on your phone, and then you lose access to those files, or you forget where you stored them. iTechnology Australia will provide you with certain tips to help you retrieve those files. The services of data recovery in Perth will also assist you in implementing some methods that will help you prevent this mistake of losing important files again.


These are some simple tips and tricks that will help you to uncover where actually the files are:- 

  • First of all, the basic method is checking all the hidden folders on your phone because sometimes the missing files are just there in front of you. If you don’t know how to check those hidden folders, then follow these rules, such as opening the file manager apps. After that, there would be an option to show hidden files or view hidden files. 


  • These options could be in the settings or the menu. After toggling through the menu, there would be folders whose names start with dots. After browsing, you will find the hidden files in one of the folders. The professionals data recovery in Perth will advise you to follow this method first.


  • If you are unable to find the files in the hidden folders, then Android data recovery software could be your lifesaver. These are advanced tools that are designed to explore your device’s storage for finding lost files. Some software options that can help you find the files are:- 
  • Dr Fone
  • Disk Digger
  • Ease US MobiSaver


  • Usually, Android users set up an automatic backup of files to their drives or cloud storage. So, it could be worth checking out if the lost files are in these storages. The steps to access the storage for the lost data recovery in Sydney are to open the Google Drive app on your mobile phone and search the backups folder in the drive. There is a high probability that you might find your lost files in Google Drive or cloud storage.

  • Another place to look for your files is if you use an SD card with your Android device. Sometimes, these files can be found on the SD card, and the process to access them is as follows: first of all, remove your SD card and place it in a card reader. After that, open your SD card folder and check if there are any hidden folders where you can look for the files. In addition, you can use SD card recovery software like Recuva or CardRecovery.


  • The last method is much more technical, but it can help you retrieve your files. It is an Android debug bridge. The ADB process for lost data recovery in Sydney involves installing this on the computer and then enabling USB debugging on your Android. Then, connect the Android device to the PC with a USB. After this, you will open a terminal and use ADB commands to access the file.


By following all of these methods, you can easily get access to your files if you want to recover any of your data due to any defect on your phone or computer. iTechnology Australia should be your prime choice.